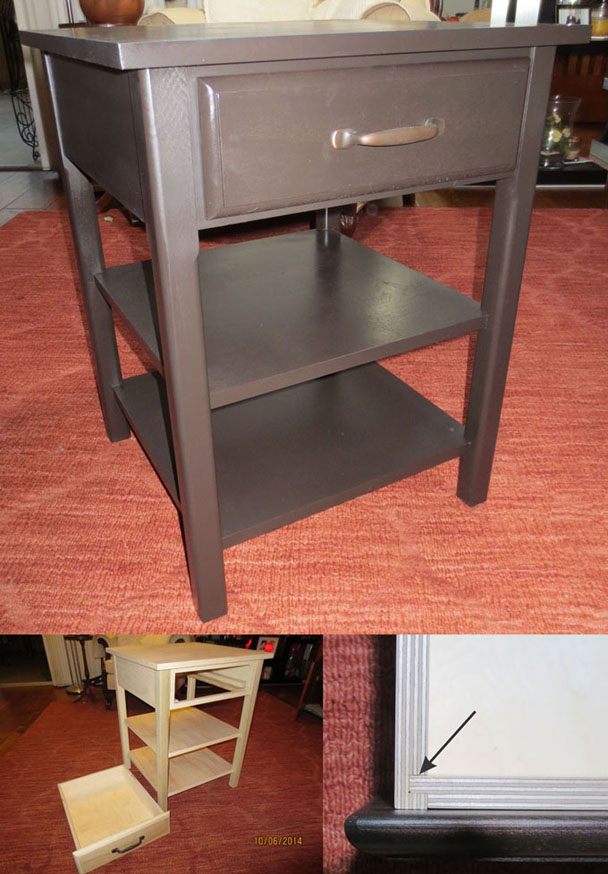
I needed a table to help clean up my computer desk. The ideal table would be the right size to hold the printer on its top and have two shelves, one for the modem and the other for the UPS (Uninterruptable Power Supply.) Ideally, it would also have a drawer for storage.
But I couldn't find a table like the small one that I've described. There were a number of likely tables that had only one shelf—plus a drawer—but I was looking for such a table with two shelves.
One of the great things about woodworking is that, if you need something but can't find it anywhere, you can build your own! And, you can have fun doing it!
Features
These are some of the features of the Computer Side Table:
- Height: 26”
- Top: 20” x 20” x 3/4”
- Shelves: 2 shelves, each 17” x 17” x 3/4”, located 4 1/2” and 12 1/2” above the floor
- Table Joinery: mortise and tenon
- Shelf Joinery: corners fitted into mortises in the legs
- Drawer (inside dimensions): 12 5/8”W x 16 5/16”L x 3 1/4”D
- Drawer Joinery: locked rabbet joints
- Drawer Sliding Mechanism: traditional wood rails and guides
- Materials: plywood top and shelves with veneer edge banding; plywood drawer sides and bottom; and Douglas fir or plywood everywhere else
- Glue: Titebond II or equivalent
- Finish: The table was primed with 1 coat of Rust-Oleum Painters Touch Flat Red. At least 2 finish coats of Rust‑Oleum Painters Touch Satin Dark Walnut were applied to all outer surfaces. Additional coats were applied to the table's top and the tops of the shelves for durability. Light sanding with 600-grit paper was done between coats.
A Few of the Details
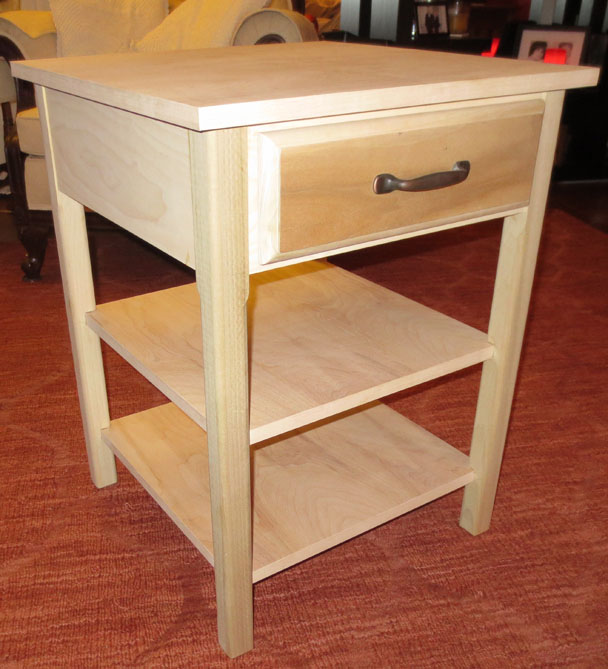
The Unfinished Table
This view gives a good look at the rounded edges of the table's legs as well as the corners of the two shelves mortised into the legs.
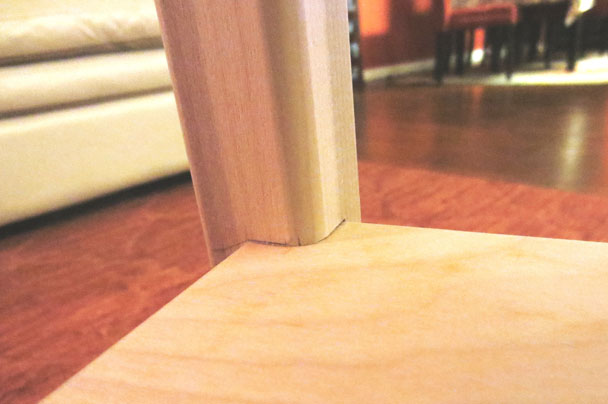
Shelves Mortised Into Legs
Each corner of each shelf is captured and glued into a mortise in the leg. This gives a clean look to the entire assembly.
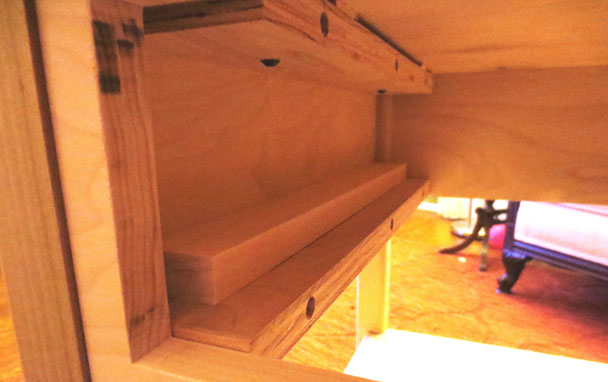
Simple Drawer Guides
The drawer rests on a guide at the left and right of the drawer opening.
The drawer is guided left and right by guides on both sides.
The drawer is prevented from tipping downward by guides along the top.
The top and bottom guides are held in place with screws located in counterbores.
Shims are placed between the top guides and the table's top.
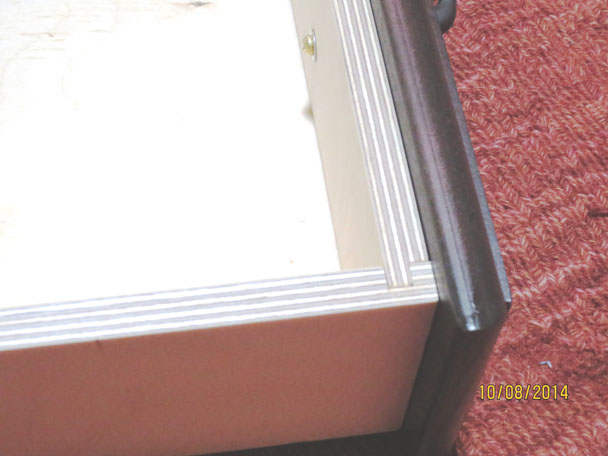
Drawer Joinery
The front and back of the drawer are joined to the sides with locked rabbet joints. This simple joinery ensures adequate strength to withstand slamming the drawer closed.
Download Free Plans, Pictures, and Instructions
The ZIP file contains all the pictures, INSTRUCTIONS.PDF file, SketchUp design file "Computer_Table_16_SKETCHUP_VERSION_8.skp", and PDF design file "Computer_Table_16_SKETCHUP_VERSION_8.pdf". BE SURE TO READ THE "INSTRUCTIONS.PDF" FILE that's included in the ZIP file.