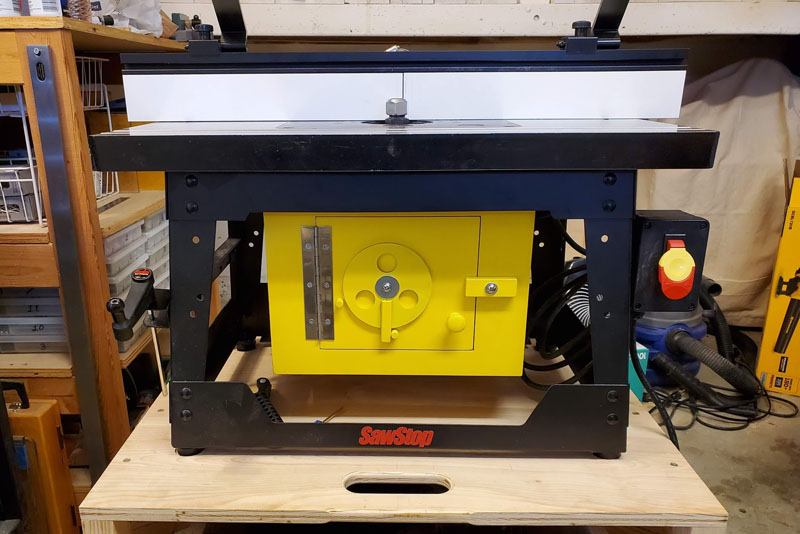
The Router Dust Collection Box is made to use a small Shop‑Vac® style shop vacuum with the SawStop® cast iron router table. SawStop's RT‑DCB dust collection box uses a 4" dust collection system, but most woodworkers use a regular shop vacuum. This box uses a standard 2 1/2" dust port and works well with smaller vacuums.
So if you use a Shop‑Vac® style shop vacuum then this dust collection system is exactly what you need to keep all that router table debris off of your shop floor.
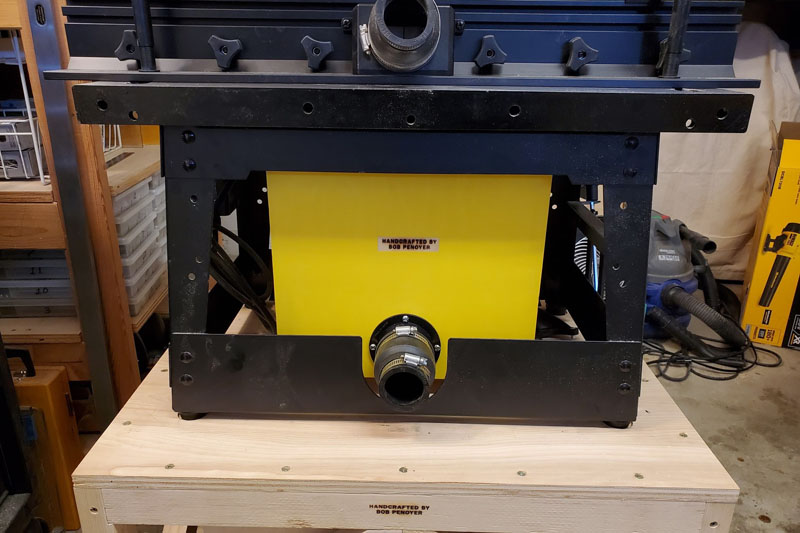
You can see in the bottom picture that I used a rubber pipe coupling so the 2 1/2" dust port will mate with my 5‑gallon shop vacuum's smaller hose.
This box is easily adaptable for use with most other manufacturer's router tables—even most homemade router tables.
Some of the Dust Collection Box's Features
- Designed to mount on a SawStop cast iron router table
- Easily adaptable for used on other router tables
- The bottom is sloped toward the dust port for efficient removal of the dust
- Internal sloping baffles prevent the dust from accumulating in the rear corners
- A standard 2 1/2" dust port is used for easy connection to standard shop vacuums
- An adjustable air gate is built into the door for relief of excessive vacuum when needed
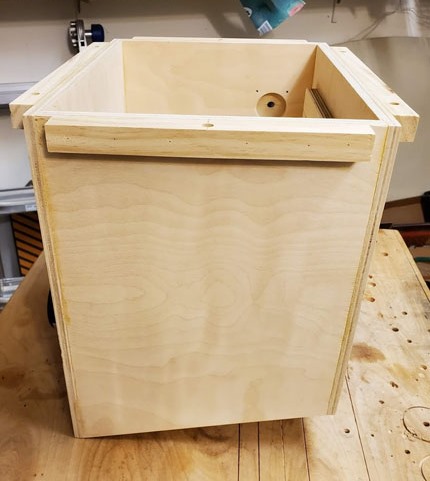
Left Side View
The Front is 2 1/8" shorter than the back. This makes the bottom slope toward the dust port at the back for optimized dust removal.
The Baffles—Looking into the Top
The two baffles slope steeply above the sloping floor to cause the router dust to fall toward the dust port hole in the back.
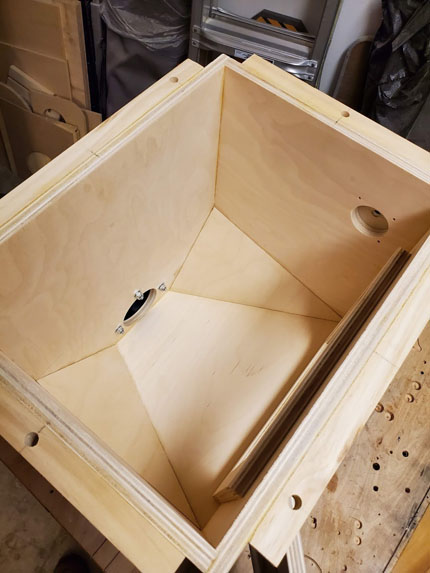
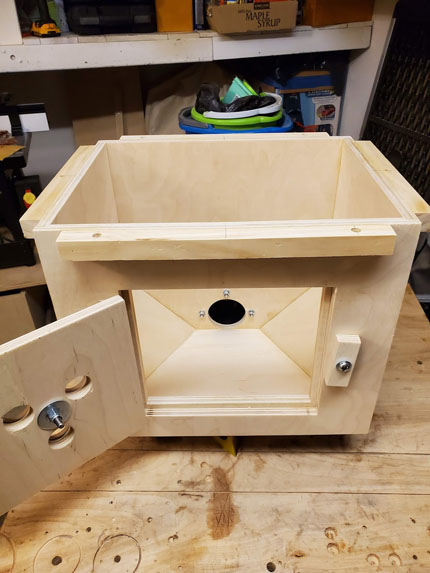
The Baffles—Looking into Door Opening
This is the view of the baffles looking through the door opening. The dust port hole can be seen in the back. Notice the door stops behind the door opening.
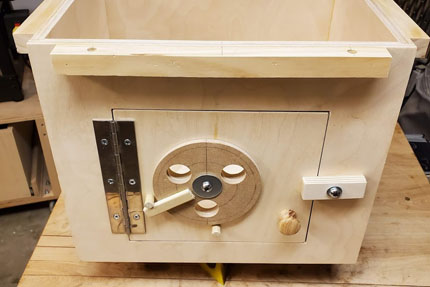
The Air Gate in the Door is Open
A rotating air gate is included to relieve the force of the vacuum when necessary. The need for an air gate might not seem obvious until you watch this video. The link is cued to the key point of interest.
https://youtu.be/aAVewir54aw?t=43
Stop pegs limit the travel of the air gate handle.
The Box Has to Be Sturdy
Forces caused when the vacuum is operating make the box want to collapse. In fact, the force acting on each side can be as much as 40 pounds inward. So the box was designed to be sturdy.
- The box’s structure comprises 1/2” plywood
- Door stop rails and stiles support the door, so it will withstand the forces pulling it inward
- Rabbets cut into the front, back, and sides provide strong joinery
- The bottom is supported by rabbets at the bottom of each Side
- The bottom door stop rail presses against the bottom at the front for strength
- A wood screw holding the bottom of the dust port at the back passes through the back and into the bottom, thus supporting the bottom there
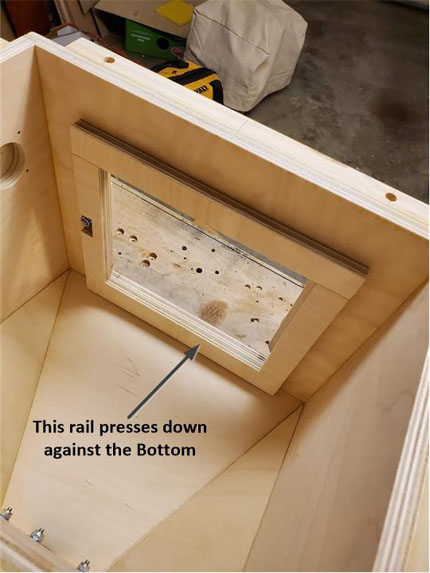
The Door Stop Rails and Stiles
The door stop rails and stiles hold the door against the vacuum force pulling it inward.
The bottom edge of the bottom rail press against the bottom of the box to help it resist the inward vacuum force.
You can see that one stile has a relief cut to make room for the hardware that holds the pivoting latch on the front.
How Well Does the Router Table Dust Collection Box Perform?
The completed box was tested by cutting two grooves 3/4" wide and 1/2" deep into a 26" piece of 2x3. This is equivalent to turning almost 20 cubic inches of wood into sawdust.
The relative volume of wood converted to sawdust is very roughly 1:2 (wood:sawdust) per these links:
http://www.woodweb.com/knowledge_base/How_Much_Sawdust_Will_I_Make.html
https://www.srs.fs.usda.gov/pubs/ja/1968/ja_1968_thompson_001.pdf
So the volume of the sawdust created in my test might have been 40 cubic inches. Picture a square box measuring about 3.4 inches on each edge that’s full of sawdust.
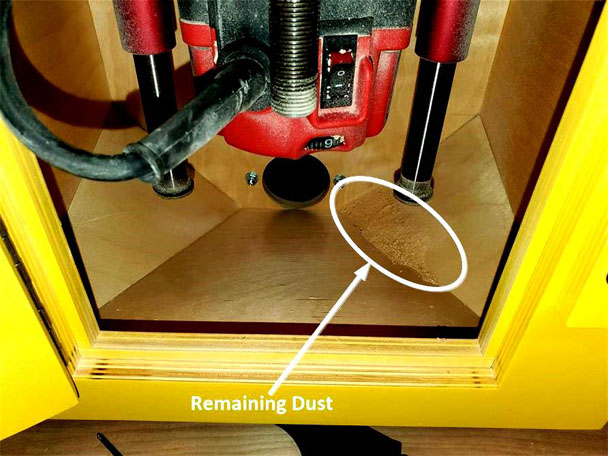
This is What's Left
This is the sawdust remaining in the box after the router produced about 40 cu. in. of sawdust.
Not much!
A small, 5‑gallon vacuum was used for this test.
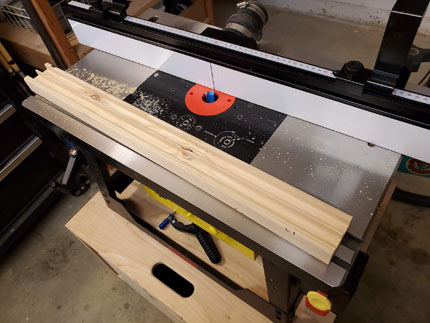
The 26" piece of 2x3 right after the test cut.
The remaining sawdust that didn't get into the box.
Download Free Plans, Pictures, and Instructions
The ZIP file contains Instruction file "INSTRUCTIONS.pdf", pictures, SketchUp design file "Dust_Collection_Box_17_SKETCHUP_VERSION_8.skp", and PDF design file "Dust_Collection_Box_17_SKETCHUP_VERSION_8.pdf". The PDF file contains all the drawings and dimensional information that are in the SKP file for those who don't use SketchUp: