This design is dedicated to the Freud 6” x 20T Super Dado Set, SD506. However, the plans and ideas presented here can be adapted to any similar dado blade set that uses 4 teeth on each chipper blade.
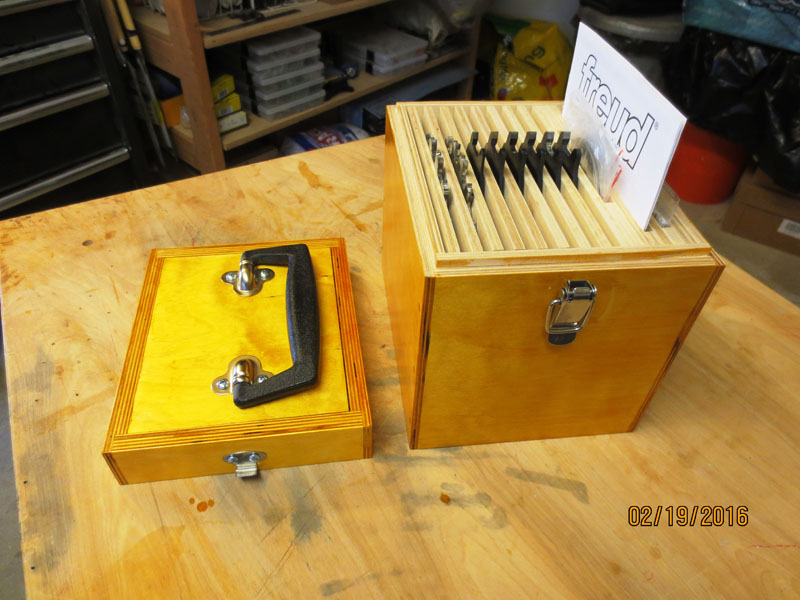
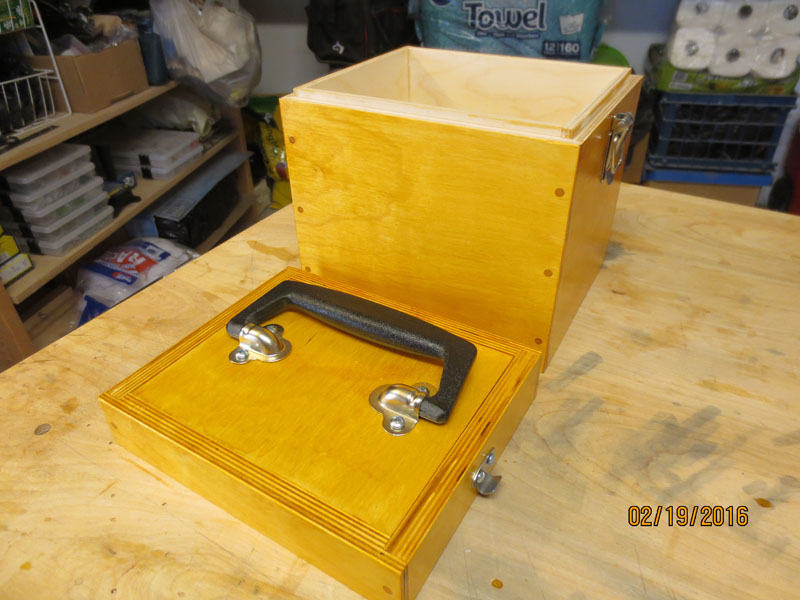
The Dado Blade Storage box provides a convenient way to store, transport, and access the blades, shims, instructional CD, and manual for the SD506 dado set.
The original Freud box simply stacks the blades. Take a look at the picture below to see how things are arranged in the original box.
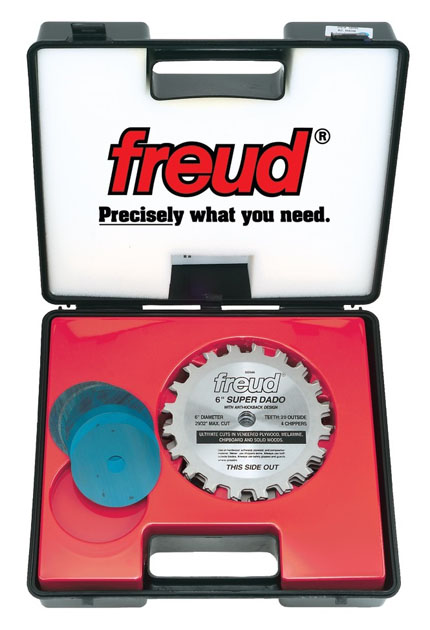
The Freud 6" x 20T Super Dado Set, SD506
This is the Freud dado set in its original box. Notice that the blades are arranged in a stack. If you want a particular blade, you have to remove all the blades stacked above it.
The instructional CD that comes with the blades, and the instruction manual are both hidden in the top of the box behind the white foam that fills the top.
You can see that the small shims are held in a round depression.
Compare with the Dado Storage Box
Compare this picture with the picture at the top of the page. See how each item in that picture is stored in a dedicated slot.
It's easy to remove and replace each item in the box, unlike the way items are accessed in the original Freud box.
The Freud box might be good for marketing and shipping the dado blade set, but removing and returning blades is very awkward. When you're working on a project, it's inconvenient to have to stop and expend the time and effort to remove blades from the top of the stack to get to the ones you need. And, when the cut is finished, the same inconvenience occurs in reverse while returning each blade back into the box.
The Dado Blade Storage Box eliminates the inconvenience. Everything is arranged so that you can access each blade directly. It's just like a card file. Just remove each item when it's needed—or put it back directly into its own slot when you're done with it. It's that easy!
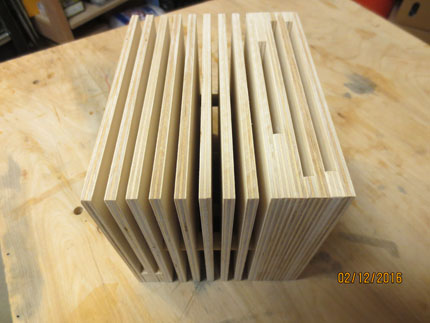
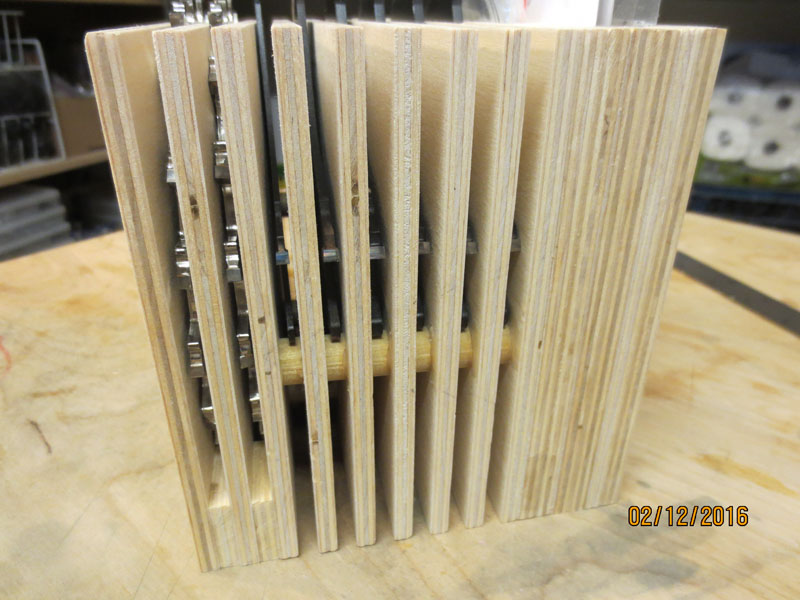
The Blade Cage
A blade cage is housed inside the box. The blade cage is a specific arrangement of 1/4" plywood sheets and spaces. Look at the picture.
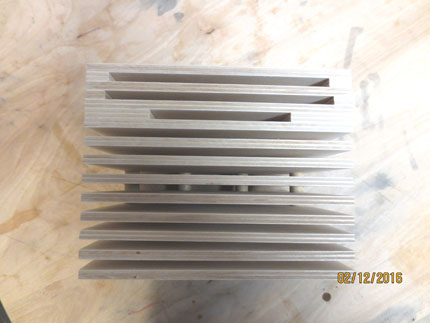
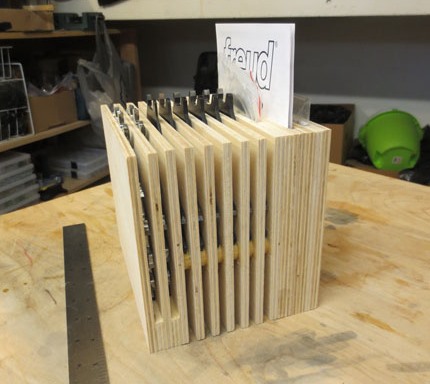
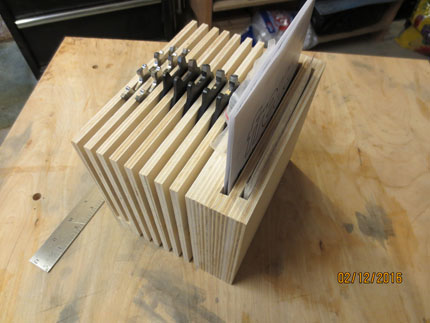
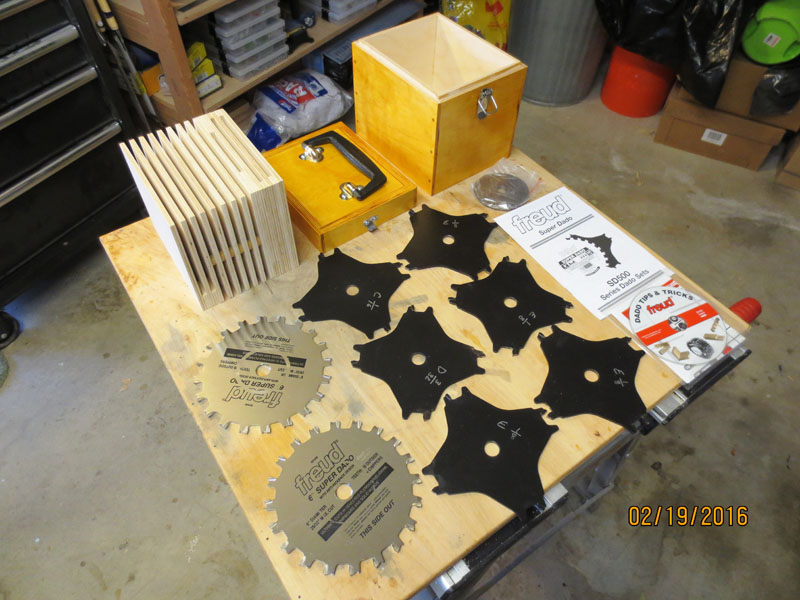
You can see in the images above how the plywood dividers of the blade cage are arranged and how they hold all items: 2 cutter blades, 6 chipper blades, the shims in their plastic bag, manual, and instructional CD in its plastic envelope.
The 6 chippers are arranged so that one tooth of each chipper points straight up to make it easy to access each chipper. This is accomplished because there are 4 "wings" on each chipper. Two of the wings rest on dowels inside each of the chipper slots. This can be seen in the two pictures below. Notice, also, that the two dowels at the bottom of the first image keep the chipper blade centered in its slot. You can see the chipper blades resting on the dowels in the second image.
Lipped Edges on the Box
The box is fabricated with built-in lips that keep the top aligned to the box bottom. You can see that the bottom of the box has a lip on the inner portion of the top rim while the top has a lip on the outer portion of its rim.
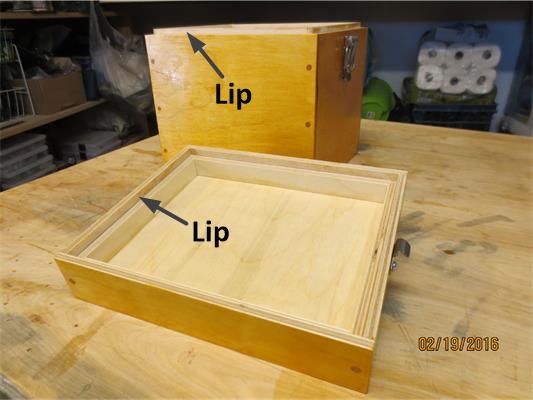
The downloadable file provides a complete explanation about how the lips are created as part of the box's fabrication.
Dowels Used for Strength
Because the sides of the box are glued together as simple but weak butt joints, dowels were added to give the joints more strength. You can see the dowels at the dark, 3/16" diameter dots in the picture below. The dowels pass through the rabbets on the front and back of the box and are then anchored into the sides.
You can also see in the picture that the sides of the box are aligned into rabbets cut into the front and back. This technique ensures that the front, back, and sides will be aligned squarely with one another.
Download the Free Plans, Pictures, and Instructions
Download a complete set of drawings and instructions so that you can build your own version of the Dado Blade Storage Box.
Unlike the other woodworking projects that you'll find here, this project download contains two SketchUp and two PDF files. One set of files is dedicated to the blade cage. The other set is dedicated to the box. They amount to two projects combining to create a single project. The PDF files each contain all the information that can be found in the respective SketchUp file so that you don't have to know how to use SketchUp to build this project.