Two Very Different but Related Boxes
These two boxes are about the same size but serve two different purposes. The one at the left is made with 7/8” sapele (pronounced sah-PEE-lee.) The one at the right is made with 3/4” plywood.
The sapele box was made for show. The plywood box was made to store a large number of router bits in a woodshop environment.
Motivation
I began building the sapele box because I found a wide sapele board. I wanted to build a box with high sides but without the need to join boards together at their edges. The wide sapele board could do the job. The box would be used to store router bits, a strictly utilitarian application. Admittedly, sapele is pretty exotic for such use—but I could avoid joining boards together.
Change of Direction – Second Thoughts & Adding Decoration
As the sapele box began to be fabricated, it started looking so nice that I decided it would be a serious mistake to use such a pretty box for storing router bits in the shop. So I began to be more careful, adding cherry veneer to the top, contrasting splines to the mitered corners, and some becoming hardware. Additionally, the sapele box was given a nice finish.
Since I still needed a box for router bit storage, I decided to make a second box that would be purely utilitarian. It would be made for strength and rough handling. I took no chance that it would look so nice that I might change my mind again. Thus, the rough plywood box was born.
No SketchUp Drawings
Unlike many of the other woodworking projects on this site, these two boxes aren’t based on SketchUp drawings. Some hand-drawn notes and other descriptions are provided that will give you enough information to build your own version of each box.
The sapele box is described first because it has more hand-drawn notes associated with it. Both boxes are about the same size, so some of the thinking that went into the sapele box is applied to the plywood box.
Some Pictures
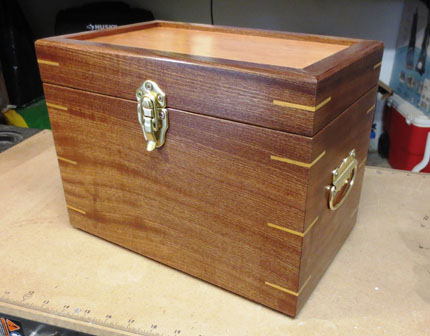
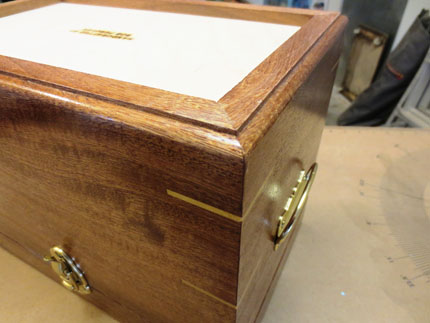
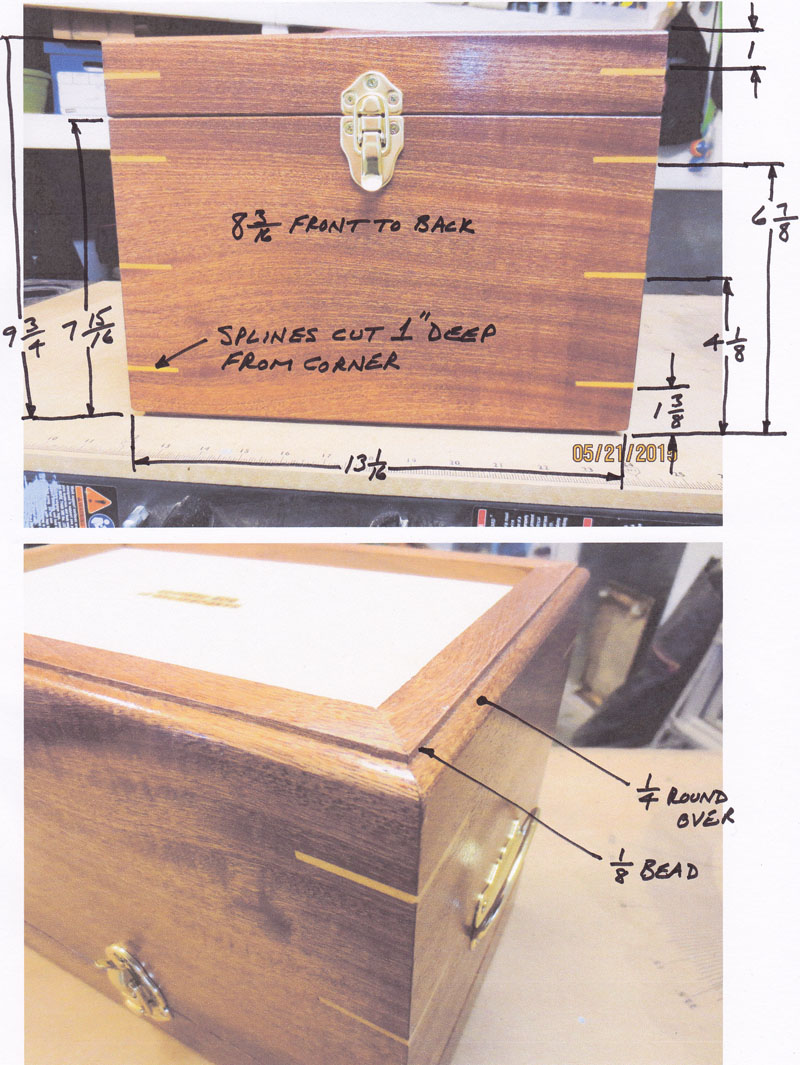
The sapele box with front, top, and end visible. Contrasting cherry veneer was used on the top. Notice that all 4 outer edges of the top have a 1/4" roundover. Contrasting yellowheart splines were used at the corners.
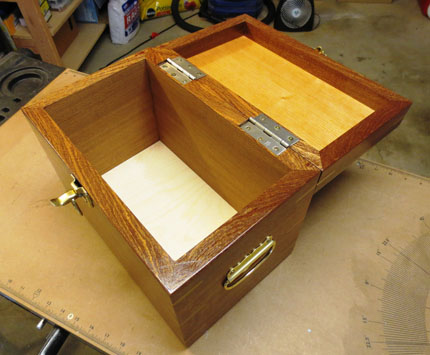
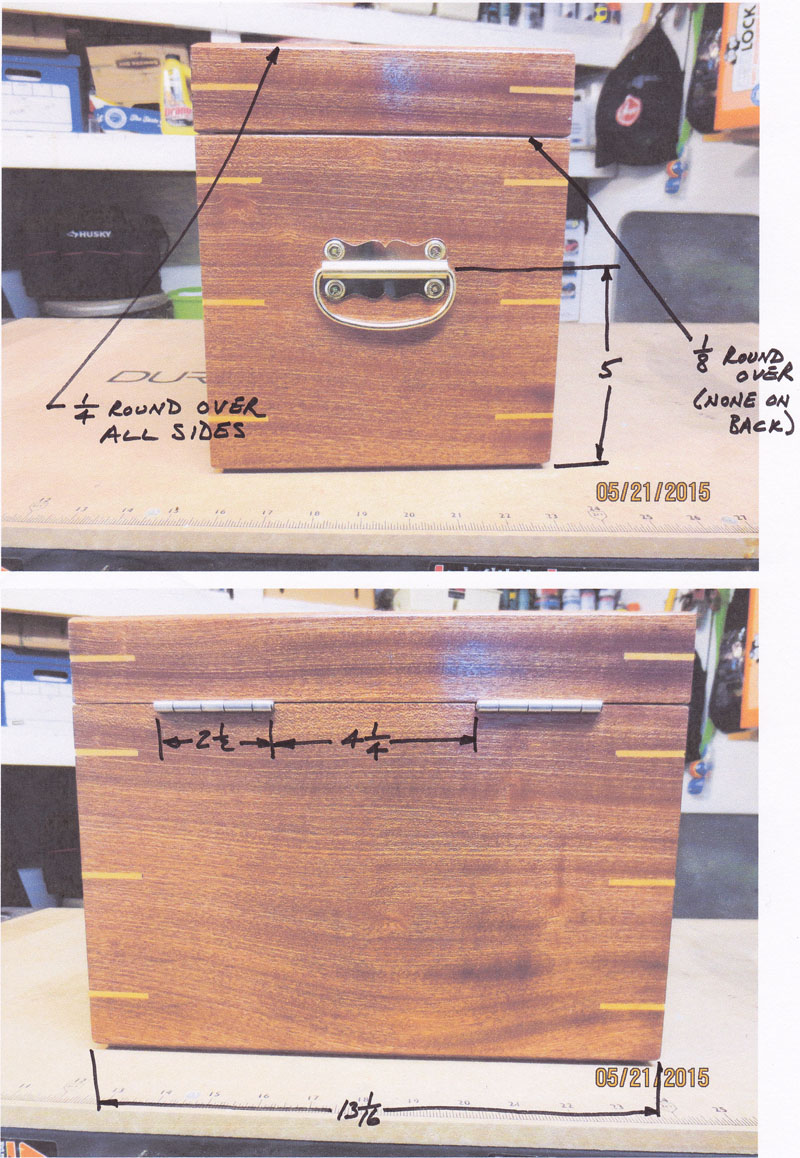
The sapele box with the top opened. The top is 1/2" plywood with a cherry veneer on both the inside and outside. The bottom is also 1/2" plywood but no veneer was applied. Notice that the hinge mortises are on the carcass only; no mortises were used on the top. A classier look could have been achieved by mortising both the carcass and the top. A 1/8" roundover was applied to 3 outside edges of the lid and the carcass. No roundover was applied to the back edges.
This is the bottom of the sapele box. You can see that no veneer was used on the bottom. The most important feature is the stepped bead next to the 1/4" roundover. The step is used to provide a defined bottom edge of the box. Not shown here, several small felt pads were added to the bottom edge to prevent scratching when the box is placed on a table top.
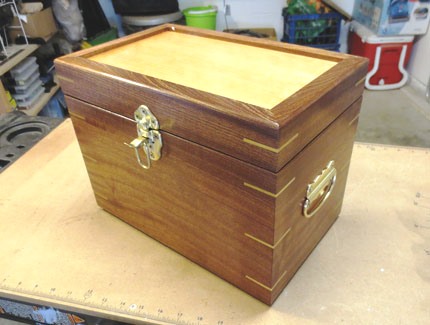
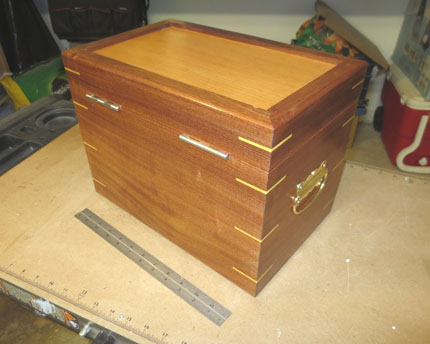
The back of the sapele box showing the hinges. The contrasting yellowheart splines are clearly seen. A 12" scale gives a sense of the size of the box.
The Details
The sapele box was created by first fabricating a 6-sided, completely closed box. The top was then removed using a table saw.
These images provide important details.
The 1/2" plywood panels used in the top and bottom were let into 1/4" deep dados. The top dado begins 1/4" from the top edge for the sake of appearance. The bottom dado begins 3/8" from the bottom edge for strength.
The screws used at the hinges were 1 1/4" brass. You should use pilot holes for each screw and apply wax to each screw's threads rather than risk breaking the screws.
The Finish
Sapele is an open-grain wood. One coat of General Finishes Seal-A-Cell was applied first. Then 3 coats of MinWax Wipe-On Poly were applied. Except for the top edges of the carcass and the inside of the top, no finish was applied to the inside of the box.
The plywood box design is based on the design of the sapele box to a limited degree. Refer to details about that box if you decided to build the plywood box.
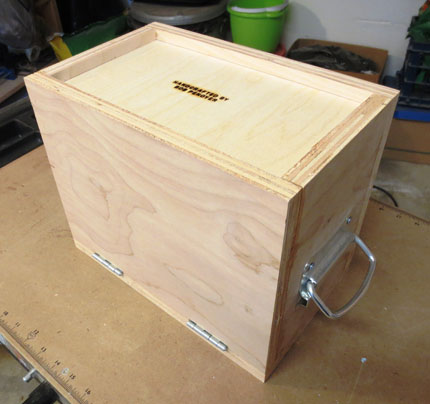
The plywood box was built for a strictly utilitarian purpose: to hold a large number of router bits and be stored in a woodshop. Therefore, it's very simple in its construction. And, it's strong enough to protect its contents and withstand the sort of abuse that can be expected in a shop environment. No finish was applied.
Pictures are provided here without dimensions. This box is roughly the same size as the sapele box, so use that box's dimensions for reference.
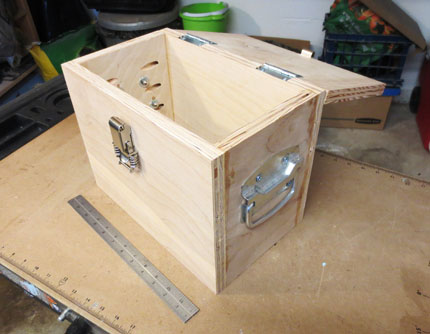
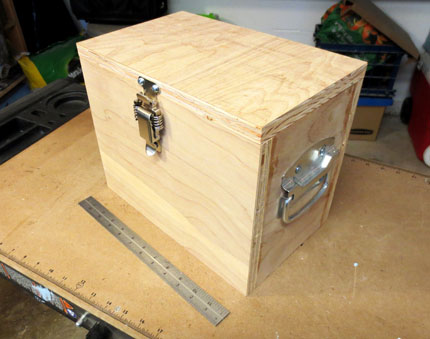
The plywood box showing the front, open top, and one end. Construction is very primitive with a simple slab top, butt joints at the corners, and pocket screw joinery. Glue is used to strengthen each butt joint.
A spring loaded draw latch is used to latch the top. The portion of the latch attached to the top is secured using two screws. Because the screws are driven into the edge of plywood, 2 1/2" screws were used to ensure strength.
Notice that utilitarian handles were used.
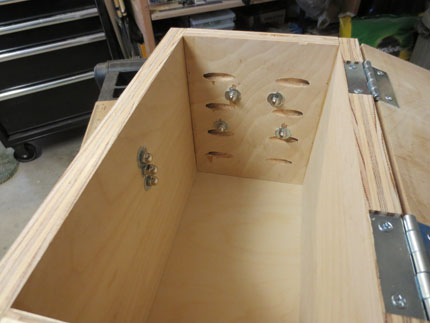
This is the inside of the plywood box. The pocket screw joinery is clearly visible.
Because the box was expected to carry a heavy load, through-holes were used to secure the hardware with T-nuts on the inside. This ensured that it would be impossible for the screws holding the hardware to be pulled out.
Unfortunately, a suitable screw length was not found. The screws that were used are so long that they extend into the box. So cap nuts were used to cover the screw ends to avoid scratches to hands while reaching around inside the box.
This is the bottom of the plywood box. The 1/2" plywood bottom was let into dados 1/4" deep. The plywood bottom is set 1/2" from the bottom edges of the box's sides.